northwest territory tent instruction manual
Northwest Territory Tent Instruction Manual: A Comprehensive Guide
Welcome! This manual provides detailed guidance for setting up and maintaining your Northwest Territory tent, ensuring a comfortable camping experience.
It covers models like the Vacation Home and Sierra, offering solutions for initial setup confusion and common issues encountered by users.
Date of Information: 03/23/2026 19:55:09 ()
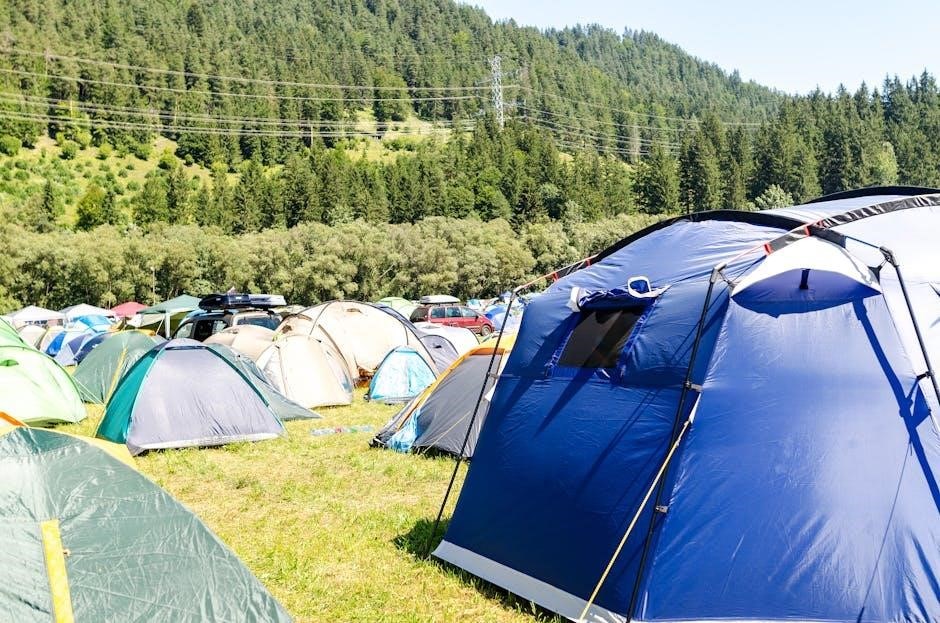
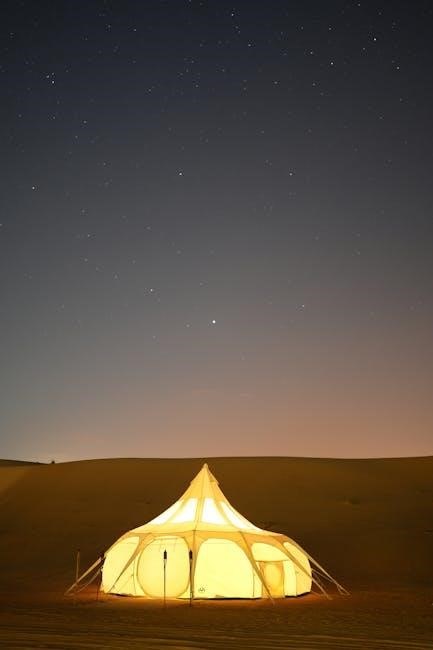
Northwest Territory tents are designed with the family camper in mind, offering spacious interiors and convenient features for a comfortable outdoor experience. Popular models, such as the Vacation Home 10-Person tent, boast a cabin-style design capable of accommodating two queen air mattresses and even an 8ft table within the entry area.
These tents prioritize ease of use, though initial setup can present challenges without instructions. Fortunately, resources are readily available online, including easily searchable guides and manuals.
The brand focuses on providing durable and roomy shelters, making them a popular choice for recreational camping. Understanding your tent’s specific features and following the setup instructions carefully will maximize your enjoyment and ensure a successful camping trip.
Understanding Tent Models: Vacation Home & Sierra
Northwest Territory offers a range of tent models, with the Vacation Home and Sierra being particularly popular choices. The Vacation Home, especially the 10-person version, is known for its spacious cabin-style design, offering ample room for families and gear. It features a large footprint (14×14) and a focus on comfortable living space.
The Sierra model, while also providing generous space, often emphasizes a more traditional dome shape. Both models share core features like durable construction and weather resistance.
Understanding the specific layout and components of your chosen model is crucial for proper setup. While setup can initially be confusing, online resources cater to both the Vacation Home and Sierra, simplifying the process for campers.
Importance of Following Instructions
Proper tent setup is paramount for a safe and enjoyable camping experience. While Northwest Territory tents are designed for ease of use, neglecting the instructions can lead to structural instability and potential weather vulnerability. Many users initially find the setup confusing, particularly with models like the Vacation Home.
Following the steps carefully ensures the tent’s integrity, maximizing its weather-resistant capabilities. Incorrect pole assembly or improper fabric tension can compromise the tent’s performance.
Fortunately, readily available online resources, including manuals and videos, can guide you through each stage. Don’t hesitate to consult these if the included instructions are lost or unclear – a well-pitched tent is a happy tent!

Setting Up Your Northwest Territory Tent
Begin your adventure! This section details the sequential steps for erecting your Northwest Territory tent, from unpacking components to securing the final structure.
Step 1: Unpacking and Inventory
Carefully unpack all components from the tent bag. Verify package contents against the assembly instructions, often pre-attached to the tent itself. Ensure you have the tent fabric, poles (fiberglass sections and metal ferrules), stakes, and any included guy lines.
Take a moment to familiarize yourself with each part. Missing components can halt setup, so a thorough inventory is crucial. If instructions are missing, remember online resources like Walmart product pages and Trailspace offer downloadable manuals.
Double-check for any damage incurred during shipping. Addressing issues early prevents frustration later. A complete inventory sets the stage for a smooth and successful tent setup process.
Step 2: Laying Out the Tent Footprint
Begin by selecting a flat, clear area free of rocks, sticks, and other debris. Lay the tent fabric on the ground with the bathtub style floor face down. This floor design provides enhanced water protection.
Pull the corners of the fabric taut, ensuring a relatively smooth and even surface. Rotate the tent so the door is facing your desired direction – consider prevailing winds and views.
Proper placement is key to maximizing space and comfort. Ensure sufficient space around the tent for guy lines and potential rain runoff. A well-positioned footprint prevents damage and enhances the overall camping experience.
Step 3: Assembling the Tent Poles
Pole assembly is crucial for a stable tent structure. Begin by unpacking all pole sections and identifying the ferrules – the metal connectors. Assemble by placing fiberglass sections into metal ferrules, ensuring each section is fully inserted and securely connected.
Gentle pressure is usually sufficient; avoid forcing the pieces together. Check for any cracks or damage to the poles before proceeding. A properly assembled pole should be flexible yet sturdy, capable of supporting the tent’s weight.
Organize the poles according to their intended use (e.g., main tent poles, canopy poles) to streamline the setup process. Refer to any diagrams included with your tent for clarification.
Fiberglass Pole Assembly
Fiberglass poles are commonly used in Northwest Territory tents due to their lightweight nature and flexibility. Assembly involves connecting segmented pieces via metal ferrules. Ensure each fiberglass section is fully inserted into the ferrule, creating a continuous pole length.
Avoid excessive force during assembly, as this can damage the fiberglass. A smooth, controlled insertion is ideal. Inspect each assembled pole for any bends or cracks before attaching it to the tent. Damaged poles compromise structural integrity.
Proper assembly is vital for tent stability. Remember to double-check connections and ensure all sections are securely fastened within the ferrules before proceeding to the next setup step.
Ferrules and Pole Sections
Ferrules are the metal connectors crucial for assembling your Northwest Territory tent poles. They securely join the individual fiberglass pole sections, creating the necessary length and strength for tent support. Ensure ferrules are clean and free of debris before assembly.
Pole sections themselves are typically color-coded or numbered to aid in correct assembly, especially for tents with multiple pole configurations. Refer to your tent’s specific instructions to understand the proper order of sections.
Carefully align each pole section with its corresponding ferrule, applying gentle pressure to ensure a snug fit. Avoid twisting or forcing the pieces together, as this can damage both the poles and the ferrules.
Step 4: Attaching Poles to the Tent
Begin by identifying the designated pole sleeves or clips on your Northwest Territory tent. These are specifically designed to accommodate the assembled tent poles, providing structural support. Carefully insert the pole ends into these sleeves or attach them to the clips.
Ensure the poles are fully seated within the sleeves or securely fastened to the clips before proceeding. This prevents the tent from collapsing during setup or use. Pay attention to the tent’s design; some models utilize a combination of sleeves and clips.
Double-check that the poles are correctly positioned according to the tent’s instructions, as incorrect placement can hinder the overall structure and stability.
Step 5: Raising the Tent Structure
With the poles attached, carefully begin lifting the tent into its upright position. This often involves gently raising the center of the tent while ensuring the poles remain securely in their sleeves or clips.
Work systematically, starting with one side and gradually raising the opposite side. Avoid applying excessive force, as this could damage the poles or tent fabric. Observe the tent’s shape as it rises, making adjustments as needed to ensure proper form.
Once upright, stake down the tent’s corners using the provided stakes. This will further stabilize the structure and prevent it from shifting or collapsing in windy conditions. Ensure the stakes are driven firmly into the ground at a slight angle.
Key Features and Components
Explore essential features! This tent boasts a bathtub floor, strategic door placement, and a ventilation system with zip windows and a full mesh roof.
Room dividers enhance privacy in larger models.
Bathtub Style Floor Explained
Understanding the Design: The Northwest Territory tents feature a “bathtub style” floor, a crucial design element for weather protection; This means the tent floor material extends several inches up the sides of the tent, creating a raised lip around the perimeter.
Benefits of this Design: This upward extension acts like a bathtub, preventing water from entering the tent during rainfall or if the ground is damp. It effectively seals the interior from ground-level moisture, keeping your gear and sleeping area dry and comfortable.
Setup Considerations: When laying out the tent, ensure this raised edge is fully supported and not obstructed by rocks or uneven terrain. Proper setup maximizes the effectiveness of the bathtub floor, providing superior water resistance and a more enjoyable camping experience.
Door Orientation During Setup
Strategic Placement is Key: Correct door orientation during setup significantly impacts your camping experience. Before fully assembling the tent, carefully consider the prevailing wind direction and the desired view from your doorway.
Practical Guidance: As per setup instructions, lay the tent fabric on the ground with the bathtub style floor face down. Then, rotate the tent so the door faces the direction you prefer. This ensures easy access and protection from the elements.
Optimizing Comfort: Positioning the door away from strong winds minimizes drafts and prevents rain from being blown inside. Thoughtful door placement enhances comfort and maximizes the usability of your Northwest Territory tent.
Ventilation System: Windows and Mesh Roof
Stay Cool and Comfortable: Northwest Territory tents prioritize airflow with a robust ventilation system designed for optimal comfort in various weather conditions. This system comprises six large, zip-up windows and a full mesh roof, working in tandem to regulate temperature and minimize condensation.
Enhanced Airflow: Six large inside zip windows allow for adjustable ventilation, providing cross-breezes when fully opened. The full mesh roof maximizes airflow while maintaining insect protection, creating a pleasant interior environment.
Benefits of Ventilation: Proper ventilation reduces humidity, prevents stuffiness, and ensures a more enjoyable camping experience. These features are crucial for maintaining a comfortable climate inside your tent.
Six Large Zip Windows
Adjustable Comfort: Your Northwest Territory tent features six generously sized, zippered windows strategically positioned to maximize airflow and provide customizable ventilation. These windows are designed for easy operation, allowing you to quickly adjust the interior climate based on prevailing weather conditions.

Versatile Ventilation: Fully opening the windows creates a refreshing cross-breeze, ideal for warm weather. Partially zipping them offers a balance between airflow and privacy. The robust zippers ensure a secure closure, keeping out unwanted insects and elements.
Interior Control: These windows contribute significantly to reducing condensation and maintaining a comfortable atmosphere within the tent, enhancing your overall camping experience.
Full Mesh Roof Benefits

Enhanced Airflow: The full mesh roof in your Northwest Territory tent dramatically improves ventilation, creating a more comfortable interior environment, especially during warmer nights. This feature allows for excellent airflow throughout the entire tent, minimizing stuffiness and condensation build-up.
Stargazing & Views: Enjoy unobstructed views of the night sky while remaining protected from insects. The mesh material provides a unique connection with the outdoors, enhancing your camping experience.
Insect Protection: The tightly woven mesh effectively keeps out mosquitoes, flies, and other pests, ensuring a peaceful and undisturbed sleep. Combined with the zippered windows, it offers comprehensive insect protection.
Room Divider Functionality (10-Person Models)
Enhanced Privacy: Northwest Territory 10-person tents, like the Vacation Home, feature a room divider, offering increased privacy within the spacious interior. This allows for separation of sleeping areas or creation of a dedicated changing room.
Organized Space: The divider helps to organize the large tent space, creating distinct zones for different activities. This is particularly useful for families or groups who desire separate areas for sleeping and gear storage.
Versatile Layout: Easily adapt the tent’s layout to suit your needs. The room divider can be utilized to create a more intimate setting or removed for a completely open floor plan, maximizing usable space.
Troubleshooting and Common Issues
Facing difficulties? This section addresses common setup challenges, locating lost instructions online via Trailspace, Fixya, and Walmart, and resolving pole assembly issues.
Finding Lost Instructions Online
Misplaced your manual? Don’t worry! Several online resources can help you quickly find the instructions for your Northwest Territory tent. Trailspace offers user-submitted reviews and often includes links to downloadable manuals or setup guides;
Finally, check Walmart’s product pages for your specific tent model; often, a downloadable manual is available in the product details section. These resources ensure a smooth setup, even without the original printed copy.
Trailspace Resources
Trailspace is a valuable community resource for Northwest Territory tent owners. Users frequently share detailed reviews and practical advice regarding setup and usage. Specifically, reviews for the Vacation Home 10-Person Tent highlight its spacious interior – comfortably fitting two queen air mattresses and an 8ft table.
While acknowledging that initial setup can be confusing without instructions, Trailspace users consistently point out the ease of finding instructions online. Many recommend a simple Google search using terms like “Northwest Territory Vacation Cottage III instructions” to quickly locate helpful guides and videos.
This collaborative platform offers real-world insights and solutions from fellow campers, making it an excellent starting point for troubleshooting or finding setup assistance.
Fixya Solutions
Fixya provides a platform where users can seek and share solutions for various product issues, including Northwest Territory tents. When facing lost instruction manuals, Fixya offers direct links to potential downloadable PDFs. One such link points to a document available at c.shld.net (spin_prod_816465312.pdf), potentially matching your tent model.
Furthermore, Fixya suggests exploring goneoutdoors.com for Northwest Territory tent setup instructions. Users have successfully utilized this resource to overcome setup challenges. The platform also addresses specific assembly questions, like how to lay the tent fabric with the bathtub-style floor facing down, ensuring proper orientation during setup.
Fixya’s archived solutions, dating back to 2015, demonstrate a consistent community effort to assist fellow tent owners.
Walmart Product Pages
Walmart’s product pages for Northwest Territory tents often contain valuable information, even if the physical manual is misplaced. Specifically, the 10-Person Cabin Tent description highlights key features like a front porch and room divider, aiding in understanding the tent’s layout.
The product details emphasize the tent’s ventilation system, noting “Six large inside zip windows and a full mesh roof” for optimal airflow. This information is crucial for proper setup and usage. While not a direct replacement for the full instruction manual, these details help clarify tent components.
Users have reported finding setup guidance by searching online, referencing the “Northwest Territory Vacation Cottage III instructions” as a helpful resource, often discovered through Walmart-related searches.
Confusing Setup – Initial Challenges
Many first-time users of Northwest Territory tents report initial difficulty with the setup process; The Vacation Home 10-Person tent, in particular, is noted as “confusing at first if you do not have directions.” This stems from the tent’s size and cabin-style design, requiring a methodical approach.
Common challenges include correctly orienting the tent – ensuring the door faces the desired direction – as outlined in Fixya solutions. Laying the tent fabric correctly, with the bathtub-style floor facing down, is also a frequent stumbling block.
Successfully navigating these initial hurdles often relies on finding online resources, as the included instructions can sometimes be unclear or missing.
Dealing with Pole Assembly Difficulties
A recurring issue reported by Northwest Territory tent owners involves assembling the fiberglass poles. The process requires placing the fiberglass sections into the metal ferrules, as detailed in the Rio Grande owner’s manual. However, users sometimes encounter resistance or difficulty connecting these components.
Ensure each section is fully inserted into the ferrule before applying pressure. If poles are stubbornly refusing to connect, double-check that you’re using the correct pole sections for each position.
Gentle twisting motions, combined with firm but controlled pressure, can often resolve sticking points. Avoid excessive force, which could damage the poles or ferrules.
Maintenance and Care
To prolong your tent’s life, regularly clean the fabric, store it properly when dry, and inspect for any damage before each use.
Cleaning the Tent Fabric
Maintaining a clean tent is crucial for longevity and performance. After each use, remove any dirt, debris, or leaves from both the interior and exterior of the tent fabric.
For general cleaning, use a mild soap and lukewarm water. Avoid harsh detergents or abrasive cleaners, as these can damage the tent’s waterproof coating. Gently scrub the fabric with a soft sponge or cloth, paying attention to areas with stubborn stains.
Rinse thoroughly with clean water to remove all soap residue. Crucially, ensure the tent is completely dry before storing it to prevent mildew and mold growth. Air drying is preferred, but if using a dryer, select a low heat setting.
Regular cleaning will help preserve the tent’s waterproof qualities and extend its lifespan, ensuring many enjoyable camping trips to come.
Proper Storage Techniques
Correct storage is vital for preserving your Northwest Territory tent’s condition. Before storing, ensure the tent is completely dry; moisture leads to mildew and damage. Loosely roll or fold the tent, avoiding tight creases that can weaken the fabric.
Store the tent in a cool, dry, and well-ventilated area, away from direct sunlight and extreme temperatures. The original carry bag is suitable, but avoid overstuffing it.
Keep the tent poles and stakes separate from the fabric to prevent punctures. Consider storing them in their designated bags. Periodically check the stored tent for any signs of damage or mildew, addressing them promptly.
Following these techniques will maximize your tent’s lifespan and ensure it’s ready for your next adventure.
Inspecting for Damage
Regular inspection is crucial for maintaining your Northwest Territory tent’s reliability. Before and after each camping trip, carefully examine the tent fabric for tears, punctures, or abrasions. Pay close attention to seams, zippers, and stress points.
Check the tent poles for bends, cracks, or corrosion, especially at the ferrules. Ensure all clips, buckles, and Velcro straps are functioning correctly. Inspect the bathtub floor for any wear or damage.
Address minor repairs immediately using a tent repair kit. Promptly fixing small issues prevents them from escalating into larger, more costly problems. Document any significant damage for potential warranty claims.
Consistent inspection extends the life of your tent and ensures your safety and comfort during outdoor adventures.

Additional Resources
Explore further assistance! Access the Northwest Territory Rio Grande manual online, and search for helpful setup videos using relevant keywords.
Links: Trailspace, Fixya, and Walmart product pages offer solutions and manuals for various models.
Northwest Territory Rio Grande Manual
Accessing the Rio Grande manual provides valuable insights into assembly and component understanding, even if your specific model differs slightly. The manual, available on ManualsLib as of January 24, 2023, details the assembly instructions originally pre-attached to the tent.
A key step highlighted within the Rio Grande manual involves assembling the fiberglass poles. This is achieved by carefully placing the fiberglass sections into the metal ferrules, ensuring a secure connection. This process is fundamental to establishing the tent’s structural integrity.
While focused on the Rio Grande, the principles of pole assembly and tent setup often translate across Northwest Territory models, offering a useful reference point for owners of Vacation Home or Sierra tents facing initial setup challenges.
Source: ManualsLib (Accessed 03/23/2026)
Online Setup Videos (Search Terms)
Visual learners often benefit from setup videos supplementing the written manual. When searching online platforms, utilize specific keywords to refine your results and locate relevant content. Effective search terms include “Northwest Territory Vacation Cottage III instructions” – a phrase mentioned in Trailspace reviews as a helpful starting point.
Broaden your search with terms like “Northwest Territory tent setup” or “Northwest Territory cabin tent setup” to uncover videos demonstrating assembly for similar models. Remember to specify your tent’s approximate size (e.g., “10-person”) for more targeted results.
YouTube and other video platforms are excellent resources. Be prepared to review multiple videos, as variations in tent models and presenter styles exist.
Date of Information: 03/23/2026